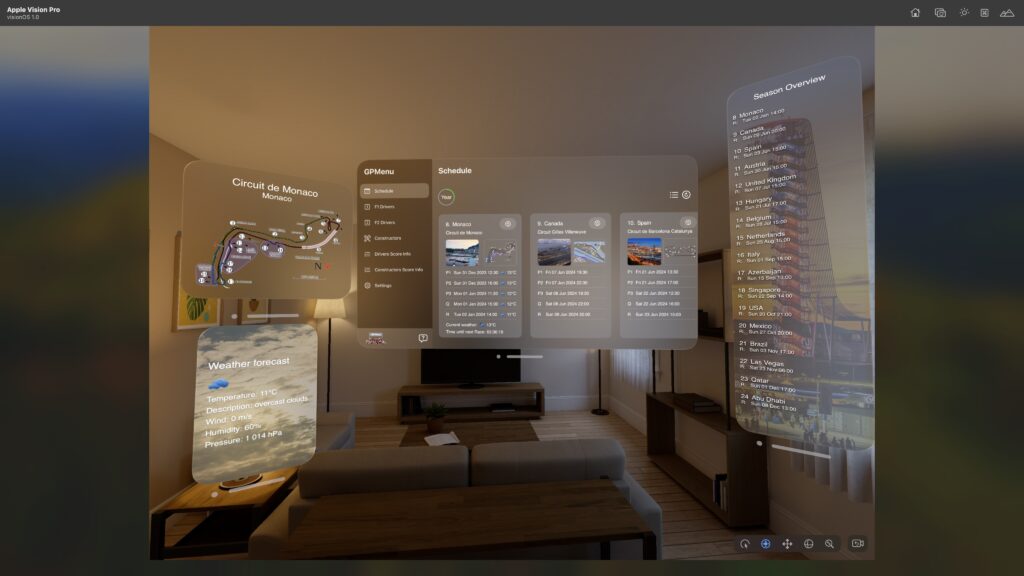
GP Forecast – Immersive weather race seasonGP

Are you a real racing fan? Do you want to experience the thrill of wet races in immersive VR? Do you want to stay updated on the latest standings, documents, and votes? Do you want to learn more about the cars, the scoring, and the tires? If you answered yes to any of these questions, then this app is for you!

GP Forecast is the ultimate app for racing enthusiasts. With this app, you can:

  • Watch the weather conditions of each race in stunning VR. Feel the raindrops on your face, hear the thunder in your ears in spacial audio, and see the lightning in your eyes. Wet races are more exciting and unpredictable, so you will never get bored of following the weather each race.
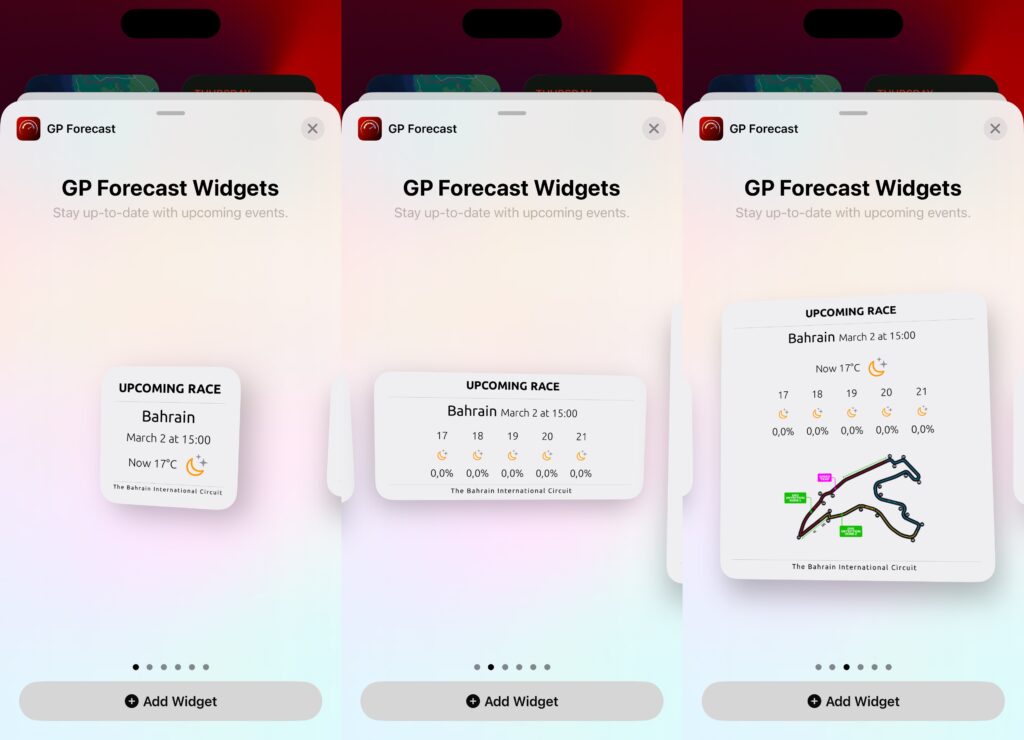
  • Get hourly weather forecasts for each race location. Plan your viewing schedule accordingly and never miss a moment of action.
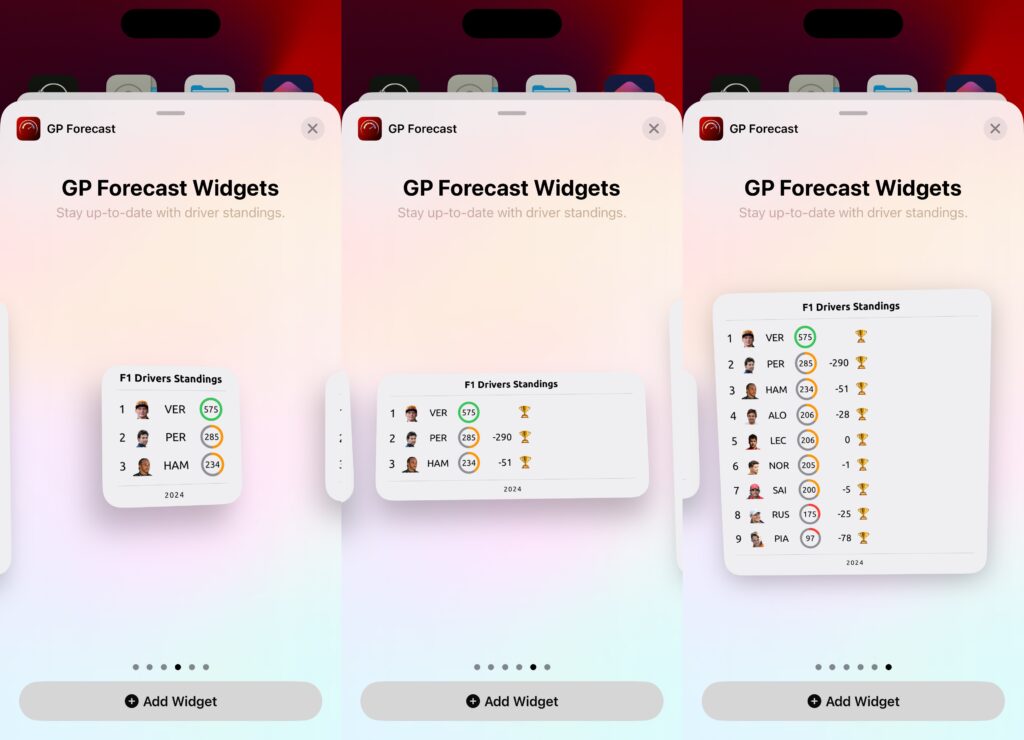
  • See the drivers and constructors standings. Find out who is leading the championship, who is chasing them, and who is falling behind. You can also see the points breakdown for each race and each driver.
  • Preview the track in details with DRS points, and check on the map where the race is located.
  • Access the official race documents, such as the race director’s notes, the stewards’ decisions, the technical regulations, and the sporting regulations. Learn about the rules and regulations that govern the sport and how they are enforced.
  • Vote for the driver of the day after each race. Show your support and appreciation for your favorite driver and see how other fans voted. You can also see the results of previous votes and the reasons behind them.
  • Learn more about the cars, the scoring, and the tires. If you are new to racing or want to refresh your knowledge, this app will help you understand the basics and the details of the sport. You can see how the cars work, how the scoring system works, and how the tires affect the performance and strategy.

It supports the following immersive weather conditions with accompanying spacial audio:

  • Clouds
  • Rain
  • Drizzle
  • Heavy rain
  • Thunder
  • Sleet
  • Hail
  • Fog
  • Snow
  • Sun
  • Moon
  • Wind in three different forces: breeze, wind and storm (Spacial Audio only)

GP Forecast is the app that every race fan needs. Download it today and enjoy the best of high speed racing!

Get it here: https://itunes.apple.com/WebObjects/MZStore.woa/wa/viewSoftware?id=6476766627

To get support please contact us by email at 7redbits@gmail.com.

Cannot start iBooks error

Today I was breaking my head on the fact that Books or iBooks like it used to be called, did not want to start. This happens once in a while on my Mac, with much frustration. Most posts in Apple Forums suggest deleting cookies and files in Containers and Preferences folders in your Library, like the BKAgenent folder.

What fixed it for me was to check or uncheck and reboot: System Preferences > iCloud > iCloud Drive Options to make sure that Books is checked.

MacOS Tips: Expand all in Finder

In the Finder when you are using List Views, when you open a folder, the content of the folder is collapsed by default. You have to manually click on each folder to expand its content as well.

There is a faster method of expanding all the underlaying folders in one click and that is with: Option-Click on the triangle.

Note this also works in other applications like XCode for example.

Default behaviour
Option-Click behaviour

Bitcoin Full Node on Raspberry Pi 4 (remote install)


Recently I’ve spend some time building a Bitcoin Full Node on my new Raspberry Pi 4B 4GB, to help support the bitcoin network. It was quite a challenge to get it all working, let me explain why.

I started off ordering the following equipment on Amazon;
* Raspberry Pi 4B 4GB
* USB-C power adapter
* 1TB SD Card
* LCD screen for the Pi
* Mirco HDMI -> HDMI

My goal was to save money on an external disk and put the whole code plus blockchain on the 1 Terabyte SD Card. After several unfruitful attempts trying the installation, I finally found that my main issue was that I tried to install all on the SD Card. SD Cards are not made for so many writes apparently, the card gets corrupt and the Pi doesn’t reboot after that. That was a bummer, I could’ve saved some money on the big SD card. Then the next issue I found out is that the Pi 4 does not boot from the external USB key, not yet supported.

So my final setup is like this;
Initial boot -> SD Card
Raspbian OS -> USB Key 8GB (more is better)
pi home dir and blockchain -> External HD 1 TB

Raspberry Pi connected via an ethernet cable to the internet router.

Flash OS on the SD Card

  1. download the imager software to write the Raspberry OS to the SD card. Follow instructions in the app.
  2. write a file called ssh to this new SD card volume, so you can access it remotely.

Login with ssh: (find the IP address with a network scanning tool)

ssh pi@192.168.1.71

username: pi
password: raspberry

Move the root file system to the USB key

Follow this article to achieve this. See section

“Update the Operating System” on how to login with SSH

Prepare the external USB HD or SSD

Use the commands in the article above to format the external HD, then update the /etc/fstab so that it mounts with each reboot under /mnt

Mine looks like this;

proc            /proc           proc    defaults          0       0

PARTUUID=6c586e13-01  /boot           vfat    defaults          0       2

/dev/disk/by-uuid/77204576-e889-40c5-a74c-a4232f5d16af  /               ext4    defaults,noatime  0       1

/dev/disk/by-uuid/fc80929a-890b-46eb-bff5-c483165cfec2 /mnt             ext4    defaults,noatime  0       1

# a swapfile is not a swap partition, no line here

#   use  dphys-swapfile swap[on|off]  for that

Once rebooted and you can see the volume, create the .blockchain directory on it;

cd /mnt

sudo mkdir .blockchain

Update the Operating System

I did all this remote because I don’t have an USB mouse and keyboard. I used Ip Scanner for the Mac to discover the IP address of the Pi.

1. Open Terminal on the Mac or Putty on the PC and ssh into the IP address, for me this looked like this;

ssh pi@192.168.1.71 (default password is; raspberry)

2. Now change the root password immediately

passwd

3. Set the locale correct

sudo locale-gen && sudo dpkg-reconfigure locales 

> select en_US.UTF-8

4. Update the Raspbian OS

sudo apt-get update  -y && sudo apt-get upgrade -y

Install tightvncserver

You only need this if you install this remotely via ssh, so you can see the Raspbian Desktop on you Mac or PC.

sudo apt-get install tightvncserver -y

vncserver

By default, TightVNC runs on a port 6251. To verify TightVNC is running on 6251, enter the command:

sudo netstat -tulpn

Start the server:

vncserver :0 -geometry 1920x1080 -depth 24

Get Real VNC Viewer on your Mac/PC and connect to the IP Address like in this example; 192.168.1.71:0

Now you can see the Raspbian Desktop, open a Terminal on there and follow the rest of the installation from that Terminal.

Install Bitcoin Core prerequisites

sudo apt-get install protobuf-compiler libminiupnpc-dev libevent-dev libtool libssl-dev libboost-all-dev qt4-dev-tools libprotobuf-dev libqrencode-dev autoconf -y

Install berkleydb

mkdir ~/bin

cd ~/bin

wget http://download.oracle.com/berkeley-db/db-4.8.30.NC.tar.gz

tar -xzvf db-4.8.30.NC.tar.gz

cd db-4.8.30.NC/build_unix/

../dist/configure --enable-cxx

make

sudo make install

Install qt5-default needed for GUI in next step

I believe this is only needed when you download the smaller Raspbian Images.

sudo apt-get install qt5-default -y

sudo apt-get install qttools5-dev-tools -y

Install Bitcoin Core

cd ~/bin

> check on github the latest stable version, in my example it is 0.19, use this after the -b parameter.

git clone -b 0.19 https://github.com/bitcoin/bitcoin.git

cd bitcoin/

./autogen.sh

./configure CPPFLAGS="-I/usr/local/BerkeleyDB.4.8/include -O2" LDFLAGS="-L/usr/local/BerkeleyDB.4.8/lib" --enable-upnp-default --with-gui

make

sudo make install

Move the home dir content to the HD

cd ~
sudo mv * /mnt

Start the Bitcoin Wallet

Now this can take a week to complete, the wallet will sync the whole blockchain which is 255 GB at this time of writing. I’ve added some parameters to limit the amount of upload MBs per day.

xhost +

sudo bitcoin-qt -datadir=/mnt/.blockchain -maxuploadtarget=250 -listen=0

The htop command is showing the Pi’s 4 cores and memory being used to the max by the Bitcoin Core software.

Extra info

Here you go, now you are supporting the Bitcoin network by validating transactions! I’m not going to use the wallet to store my real BTC, I don’t want to get hacked. My current storage is safer.

If you ever need to update the firmware of the Pi;

sudo apt-get install rpi-update -y
sudo rpi-update -y

The HDMI cable was sometimes useful if I wanted to see if my Pi was booting or not, I connected it to my TV. The LCD display came with a box to put the Pi in, but the dimensions were off although it was sold being compatible with the new model, so the box is useless, the LCD I might still install, not sure yet. The nice part is that it can display the current value of BTC.

Feel free to comment or correct this article.